Getting Started with Ethereum Blockchain and Solidity
Building a simple bank with solidity and deploying it on Ethereum Rinkebey Test net.
Table of contents
Hey Everyone 👋👋
By now you have probably heard of Blockchain and Web 3.0 and it is already the best time get started with it.
Now, according to Wikipedia🌐:
Ethereum is a decentralized, open-source blockchain with smart contract functionality. Ether (ETH or Ξ) is the native cryptocurrency of the platform.
In simple terms to me it is a developer's blockchain which is running on multiple computers where we can deploy and develop our own smart contracts to build decentralized applications (Dapps).
📃 What are smart contracts ?
Smart contracts are just like physical paper contracts except they don't need paper 😅 or any manual work to execute them. All the instructions are automated and these instructions get executed when certain conditions are met.
To write smart contracts on Ethereum blockchain we need Solidity. Solidity is programming language which is needed to write smart contracts.
Okay, that's a lot to take in, lets dive into coding our own simple bank in solidity.😁
🤚Before we begin
Let us define our bank functionalities first:
- Adding money to the bank
- Withdraw money from the bank
- View current balance for user
- View total funds
🧑💻Lets get started ..

Step 1️⃣ : We will be needing a IDE for writing our smart contracts with solidity. For that we will be using Remix. It is browser base compiler and code editor which will help us write and deploy our smart contracts on Ethereum Virtual Machine.
As it is browser based it saves a lot of setup time. You can click on the link below to go the IDE.
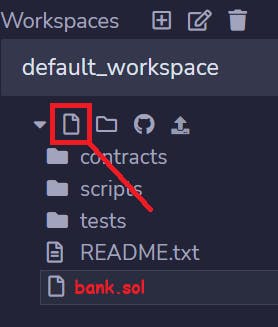
Step 2️⃣ : Now once you have opened the IDE, create a new file with extension .sol.
All the solidity files are stored with the extension .sol . This file contain all of the code required.
Step 3️⃣ : Once you have done this , you are ready to write some code. Before we implement actual function , let us first understand the layout of the solidity source file.
Every file should start with a comment which basically indicates license of that particular file.
// SPDX-License-Identifier : <License>
Comments in solidity are similar to that of Cand C++ :
// This is a single-line comment. Somehow markdown doesn't understand it.
/*
This is a
multi-line comment.
*/
Pragma
The second line should be Pragma in solidity. Now pragma is a directive that specifies the compiler version to be used for current Solidity file.
pragma solidity >=0.7.0 <0.9.0;
You can read more about the layout here .
Step 4️⃣ : Lets create our first smart contract now.
To create a contract you need use the key word contract before the name of the contract.
contract MyFirstSmartContract{
           // Every thing related to this contract goes here
}
So far our file looks like this :
 // SPDX-License-Identifier:MIT

pragma solidity >=0.7.0 <0.9.0;

contract MyFirstSmartContract{
           // Every thing related to this contract goes here
}
Voilà Congratulations on creating your first smart contract.

Step 5️⃣ : Once we have done this, we are ready to implement core bank functions.
Retrieve total Funds
uint256 totalFunds = 0;
function getTotalFunds() public view returns(uint){
        return totalFunds;
    }
Here uint256 is unsigned integer of 256 bits. Basically it is a datatype.
View keyword here signifies that this is a static function which does not modify the state. Similarly public keyword here is a visibility specifier.
Adding Funds to the Bank
mapping(address => uint) funds;

function addFunds() public payable {
        funds[msg.sender] = funds[msg.sender] +  msg.value;
        totalFunds = totalFunds + msg.value;
    }
mapping(address => uint) this is a mapping, it is just like dictionary or hashmap which is used to store data in key value pairs, key here is the address from which we are receiving funds and value is the value of funds sent by the user.
As addFunds function will receive funds, we make this function payable.
Now a payable function provides the mechanism of receiving or collecting ethers.
These functions are annotated with the payable keyword.
msg.sender here is the address of the wallet which added the Funds and msg.value is the amount which he wants to add in the contract. We are mapping the address to the amount, so we can keep track of the deposited funds.
Retrieve account balance
function getUserBalance(address userAddress) public view returns(uint) {
        uint value = funds[userAddress];
        return value;
    }
This function returns the balance which is deposited by a particular address.
Withdrawing Balance
function withdrawFunds() public payable {
        address payable withdrawTo = payable(msg.sender);
        uint amountToTransfer = getUserBalance(msg.sender);
        withdrawTo.transfer(amountToTransfer);
        totalFunds = totalFunds - amountToTransfer;
        funds[msg.sender] = 0;
    }
To transfer money from our smart contract to some other address we use the transfer method. This method reverts automatically if any error occurs.
To sum up all the code :
// SPDX-License-Identifier:MIT

pragma solidity >=0.8.0;

contract SimpleBank{

uint256 totalFunds = 0;
function getTotalFunds() public view returns(uint){
        return totalFunds;
    }

mapping(address => uint) funds;

function addFunds() public payable {
        funds[msg.sender] = funds[msg.sender] +  msg.value;
        totalFunds = totalFunds + msg.value;
    }

function getUserBalance(address userAddress) public view returns(uint) {
        uint value = funds[userAddress];
        return value;
    }

function withdrawFunds() public payable {
        address payable withdrawTo = payable(msg.sender);
        uint amountToTransfer = getUserBalance(msg.sender);
        withdrawTo.transfer(amountToTransfer);
        totalFunds = totalFunds - amountToTransfer;
        funds[msg.sender] = 0;
    }
}
Step 6️⃣ : Now that you have created you bank, lets compile and deploy it on JavaScript VM.
To Compile the file goto Solidity Compiler and hit the compile button :
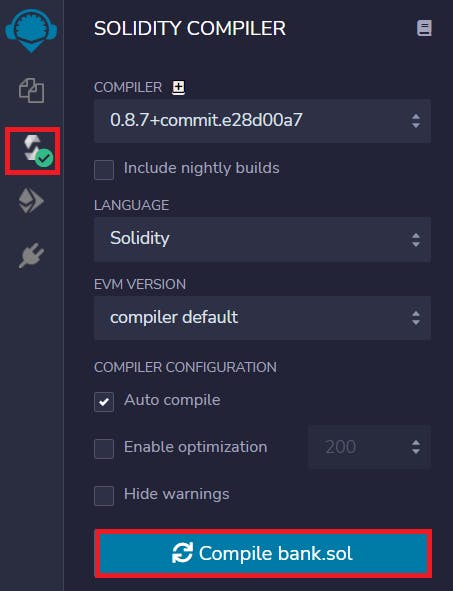
Once that is done , you can deploy your contract in deploy tab below it. After you have deployed it successfully you can see the following buttons under the deployed contract.
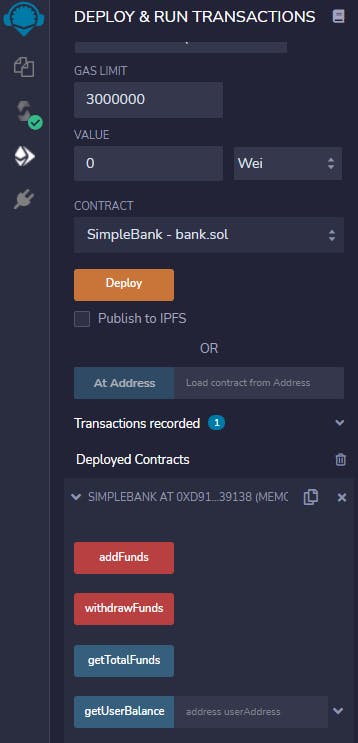
Here the red buttons signify that these functions modify the state of the contract and the blue buttons signify that these are static functions and don't modify the state of the contract.
To add Funds, you first need to input the amount :
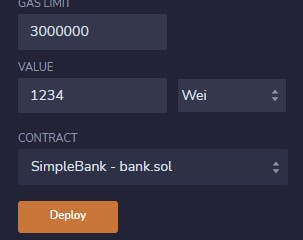
After this you can hit the addFunds button, it will do the transaction and the funds will be added to the smart contract. To get the specific user balance, you need the address of the account which you can see here at the top.

You can paste this address in the getUserBalance input feild and retrieve the amount mapped to that address.
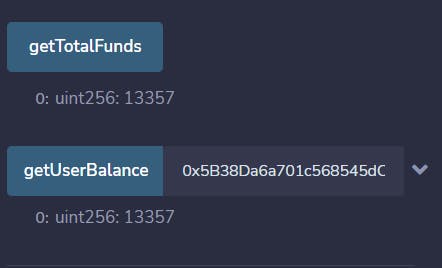
Feel free to play with the functionalities of code and Remix IDE.
Step 7️⃣ : Now as you have made your own smart contract let us deploy it on Rinkeby Test Network. For this you will be needing an actual wallet (address), which you can create on Metamask 🦊. Its really simple to do that, you can create your own Metamask🦊 account [here].(metamask.io/download.html) .
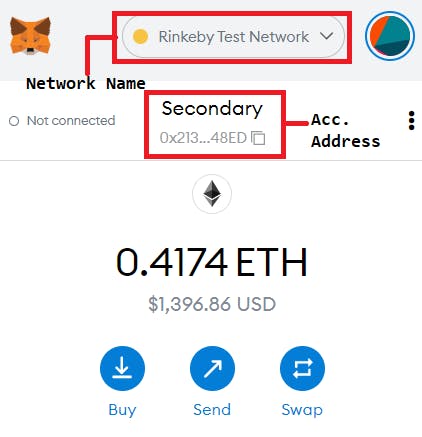
Once you have done that, you need to get some test ethers to start with, you get it from here for rinkeby network.
Now to deploy your contract to the test net go to the Remix IDE and instead of JavaScript VM, select Injected Web3.

Metamask will Popup and ask for permission. Now you can add balance and every transaction will be added to the blockchain, which is hosted on the same testnet. You can look it up here by pasting the address of your metamask account. The transactions will look like this.
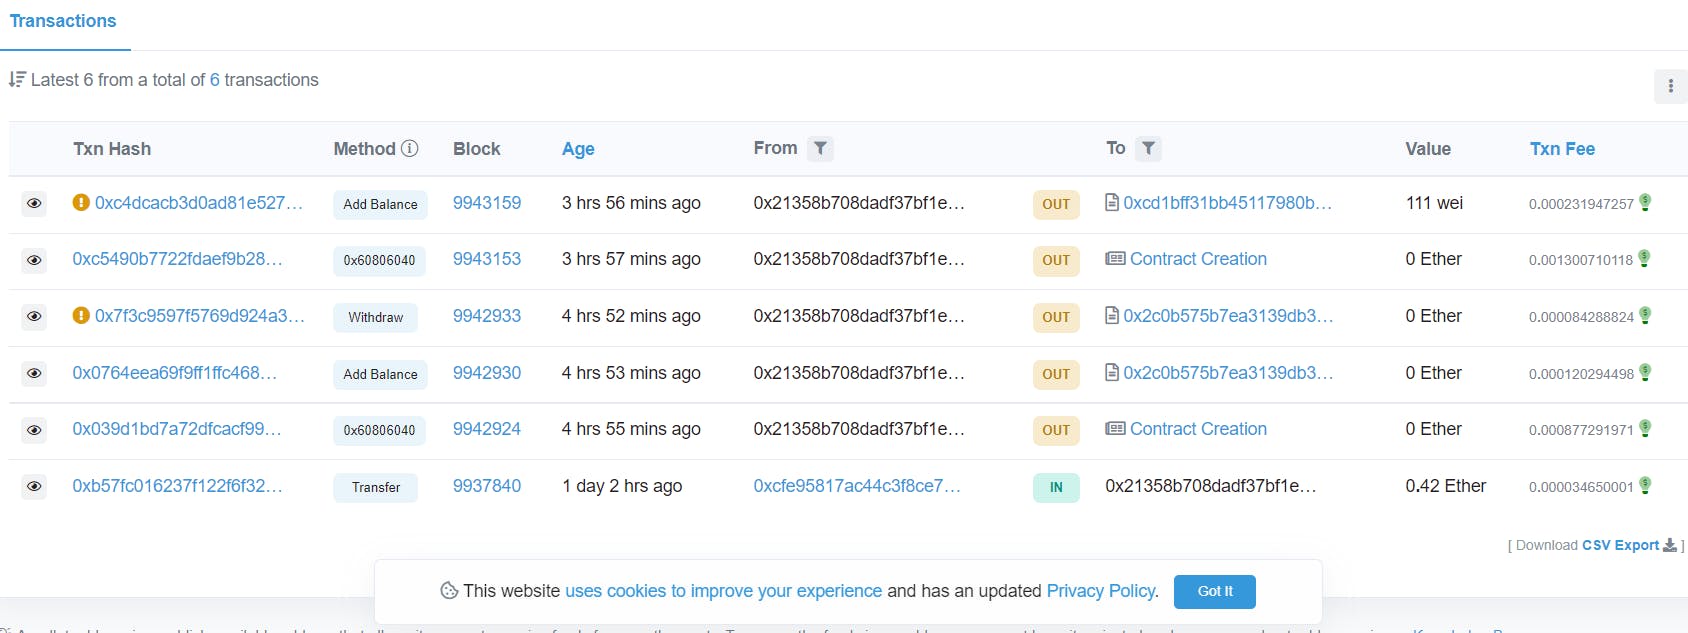
Congrats on Successfully deploying your first Smart Contract on Test net. 🥳🎉

🎯Final Thoughts
Amazing! Congratulations on making it to the end of the article and deploying your own smart contract on Ethereum.
As Ethereum 2.0 is on its way, developing smart contracts and other applications on the Ethereum blockchain with Solidity is certainly going to a help a lot in future. Let me know if I can anything to improve my upcoming articles.
Thanks for reading , I hope you had a good time implementing it. Feel free to reach out to me in your journey of Web 3.0.
I will be posting such articles on Web 3.0, if you wanna get into it, don't forget to follow me on twitter.😄😄
Adios !


